Early September 2016 I was approached by a civil engineering company to create a 500mm model of a proposed excavation site with a fair amount of detail. They needed it in a little over a month and when they came to me with a sketchup model of the excavation site I knew this was going to be difficult and possibly the most ambitious model I have ever attempted.

When you get a 3D model like this, you know you’re in for a good time.
With a few weeks up our sleeves, I told them to model it in Rhino but their modeler had not used it before, it was the only way I could make this work though. I had pretty much lost hope in this job being possible after almost 2 weeks of no contact as someone having to learn a new program for such a complex model was no easy task. I was surprised when I got an email with a model in Rhino with every detail there. Outside of the usual fixes to make it watertight with Netfabb, it was pretty good.
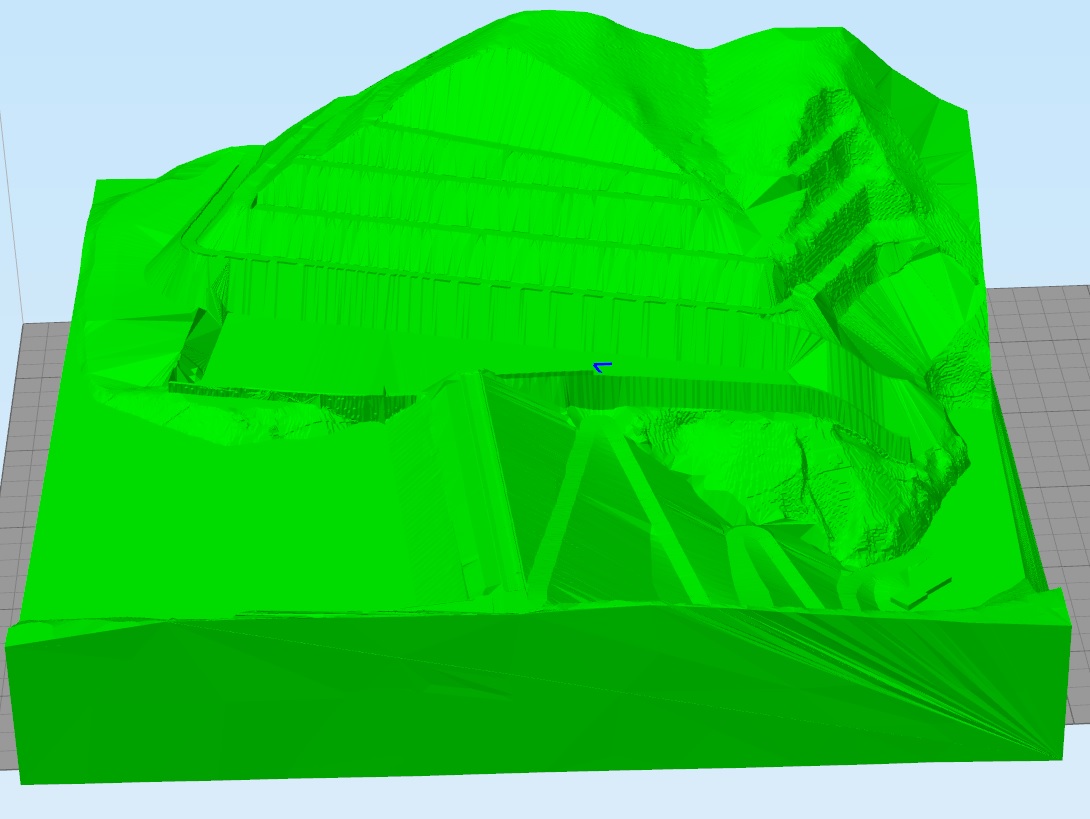
Now though the time limit was really becoming an issue. With 3 weeks to go, I was faced with the prospect of a print that would take over 150 hours when done in 16 parts and completely blow out their moderate budget due to the sheer size of it. We looked at laser cutting the entire piece by a contour map which would easily be done in time.

I tried ringing around trying to find anywhere that had the 120+ sheets we needed of 1mm card but no place had anywhere near that sort of volume in stock and there were other issues in the sheer weight of such a piece and the loss of detail. It was the only possible way to get a 500mm model done in time. The decision was made to go back to a 3D print after a few days and we were forced to scale it down to well below the desired size at now only 35cm to get it all printed in time, roughly 65 hours worth.
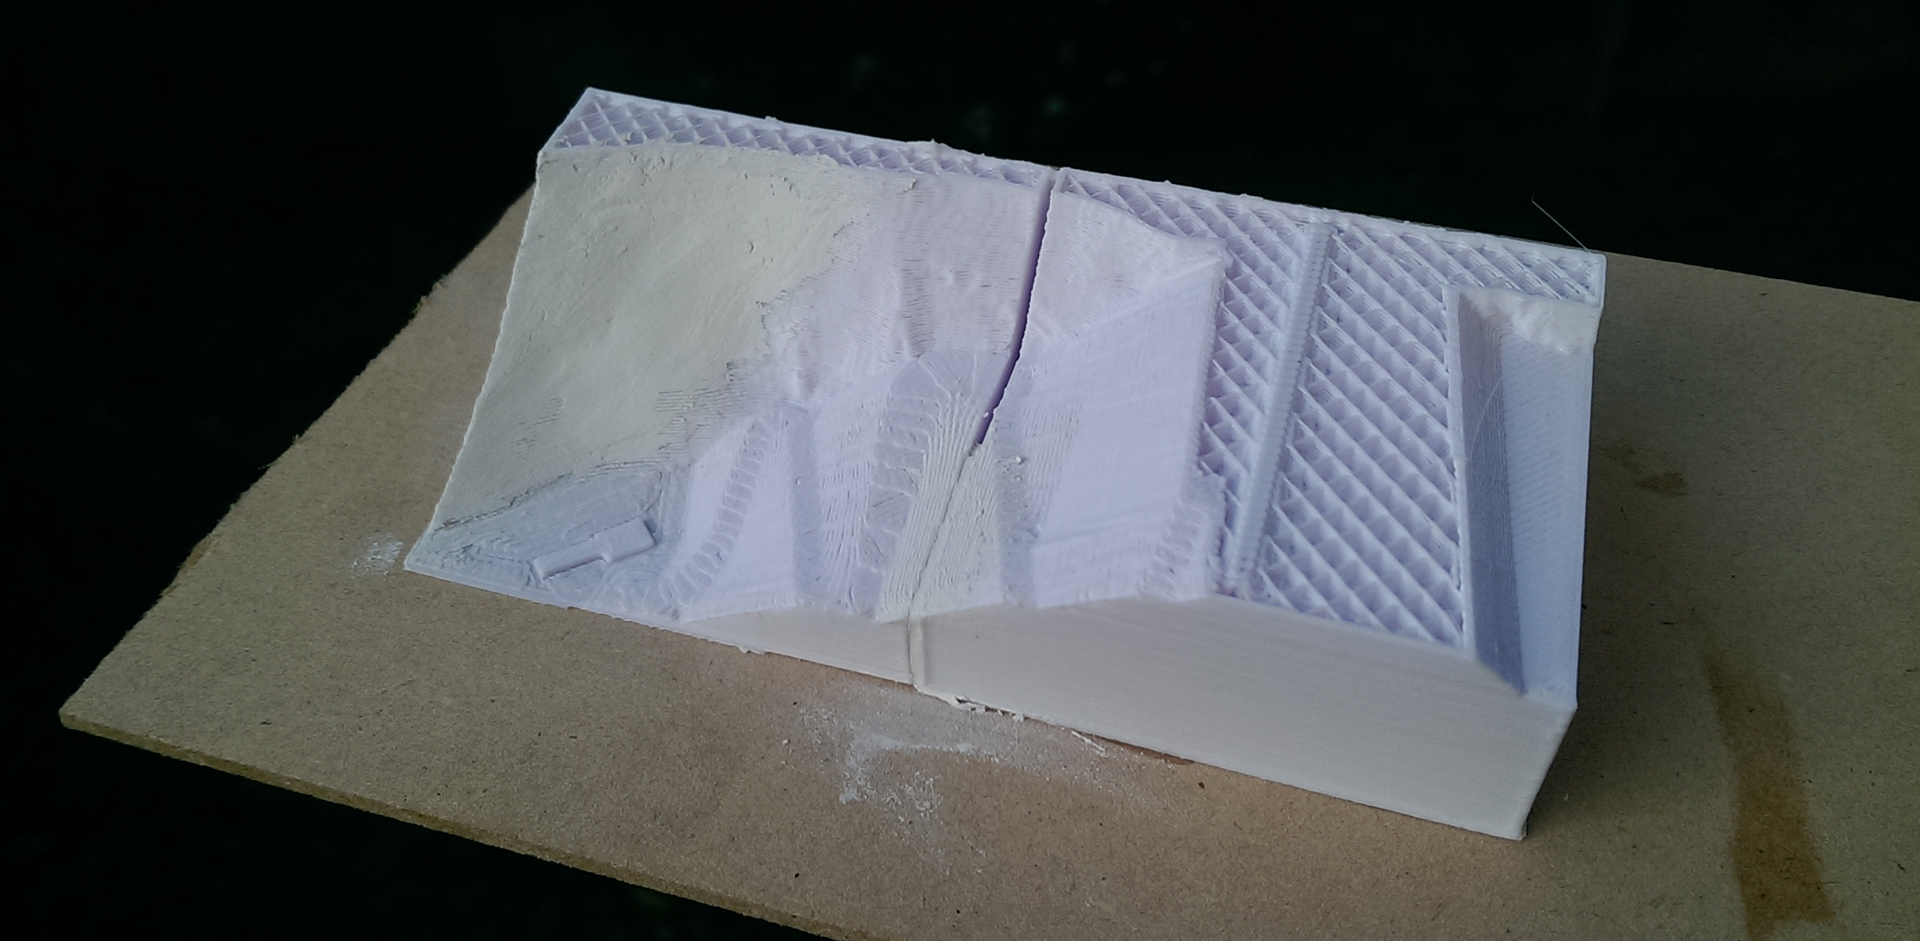
The customer wanted the smoothest surface finish but also the largest possible print. These of course, are mutually exclusive with strict time limits. I then realised that by cutting out huge chunks of material in triangular prisms, this takes the print time down a noticeable amount. This allowed me to increase the model size noticeably from 35 to 42cm to print in a similar time frame and also by switching to 0.30mm layers I managed to keep the model at 42cm while still only taking around 65 hours. I realised the layers would be quite noticeable at this height but had a plan to deal with that later on if it became an issue. To perform this action and a few other small changes to make it printable, I used Tinkercad which is very effective for how basic it is.
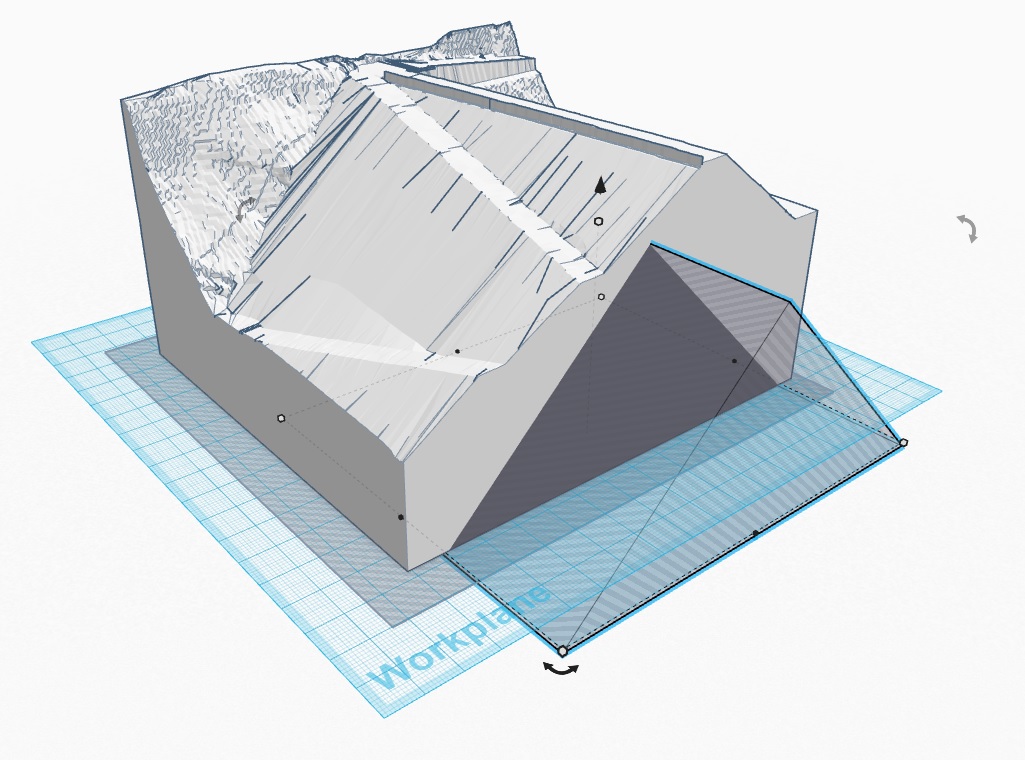
This is the absolute best way to cut down print time since the time it takes to print perimeters is longer than quick sweeping infil and with a prism cut it also allowed me to print huge voids inside it without the need for any supports. Square voids would actually take longer and are susceptible to problems where it switches to infil on top of a huge bridging area, the contraction of the plastic among layers is noticeably different.
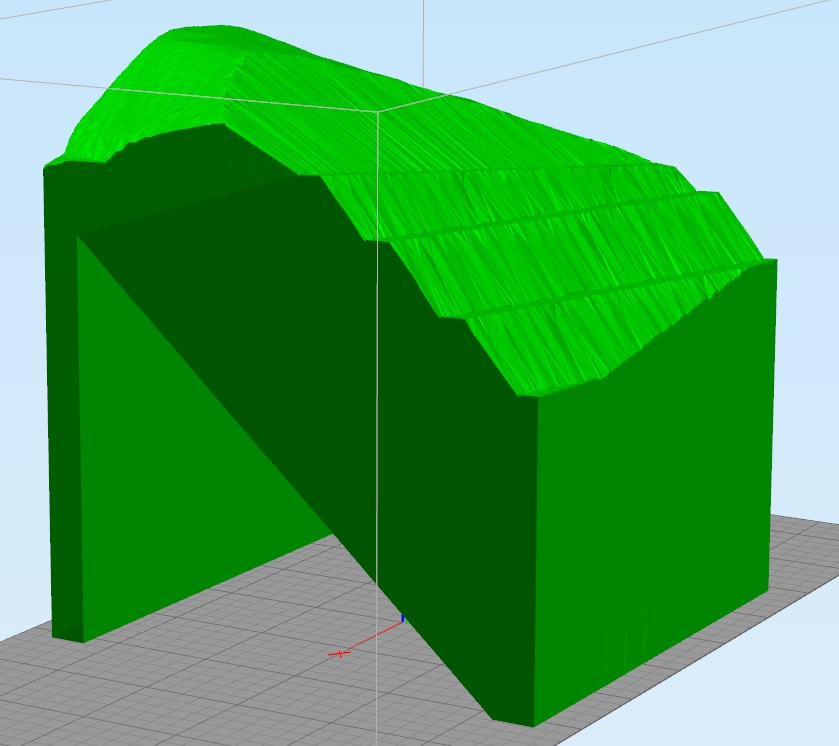
I had a little over 2 weeks to make this and it took 10 days to print most of the model and as I was nearing the end I realised the high layer height was making parts of the model almost indistinguishable where they were man-made stepped features or natural rolling slopes. Not only this but the gaps between each part were quite large and joining them would require a paste of some sort. I have done this in the past and I know that it almost always remains visible no matter how well you bog up gaps purely because of the texture difference.
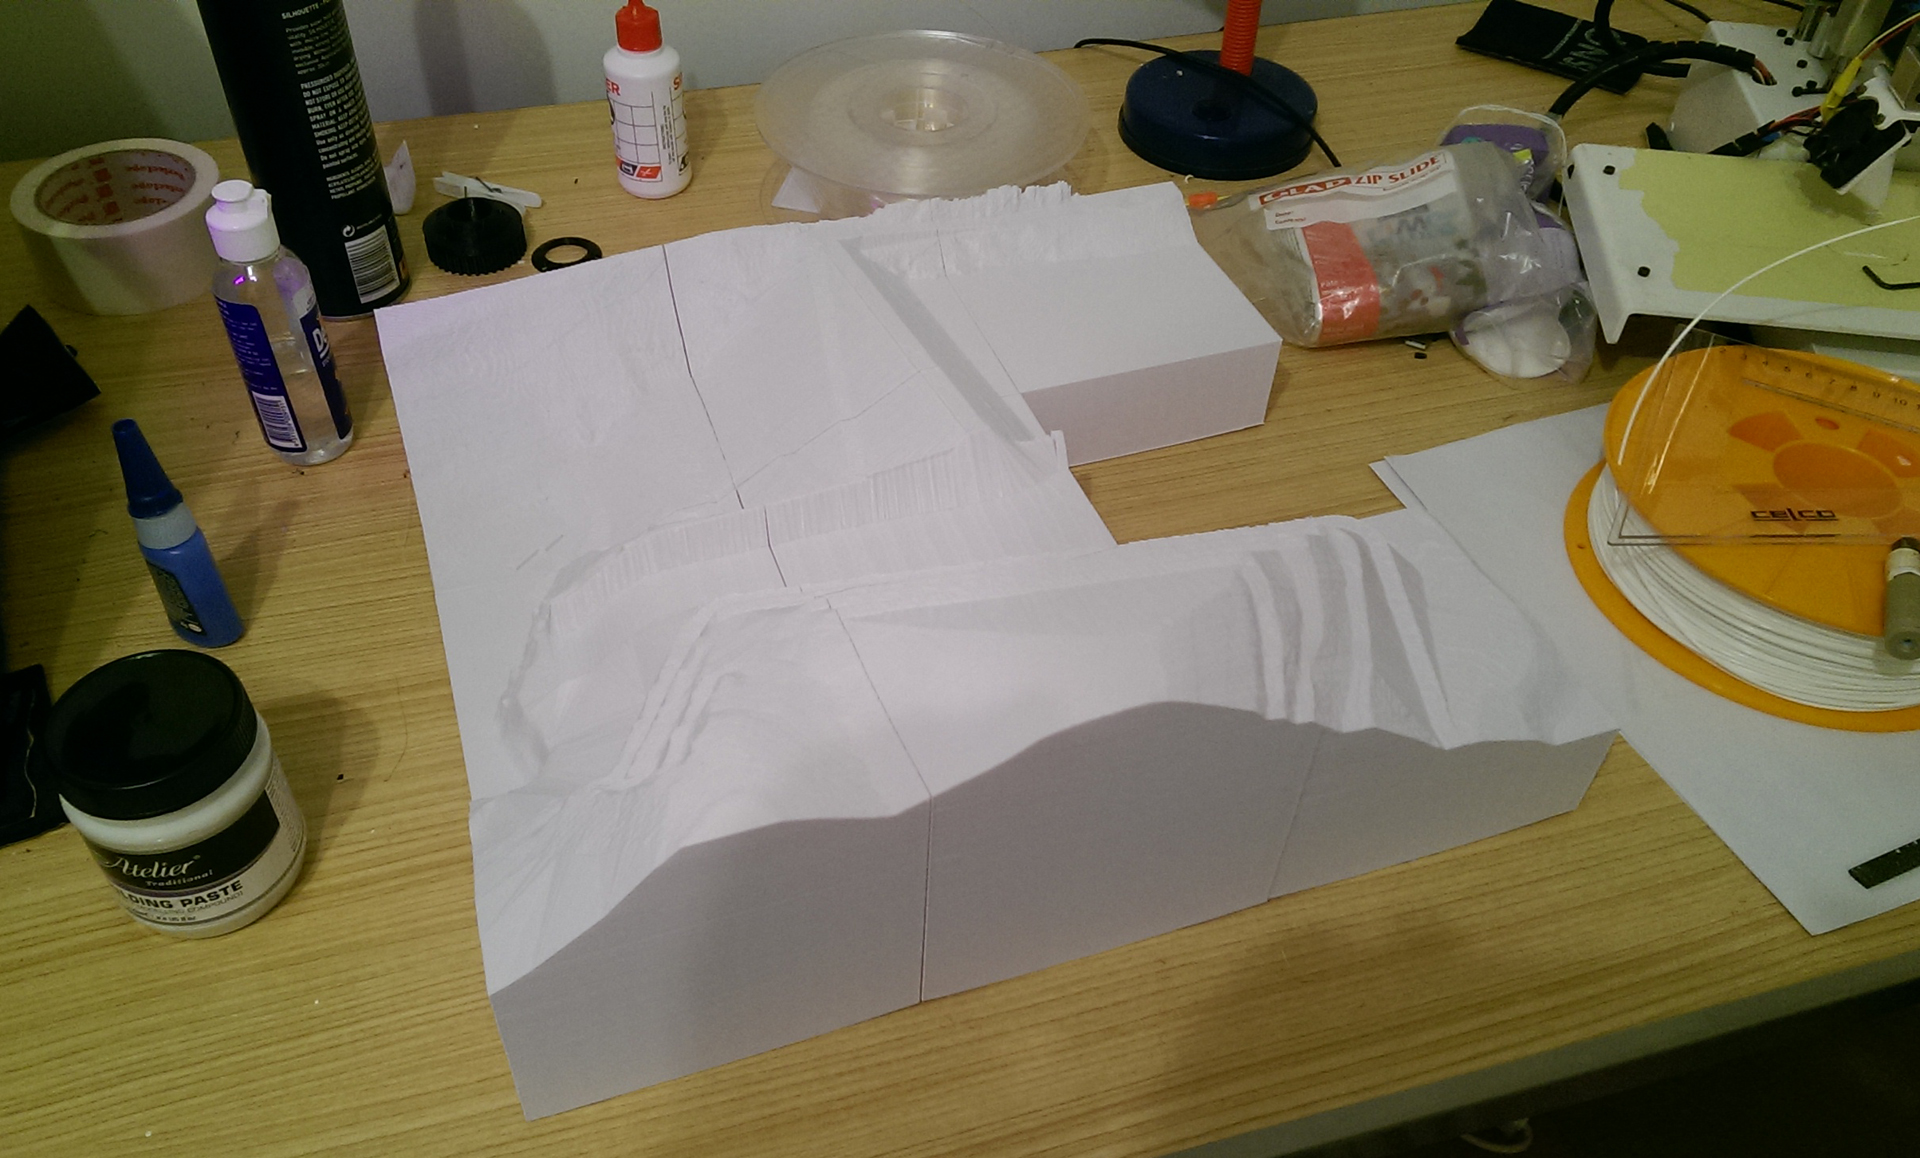
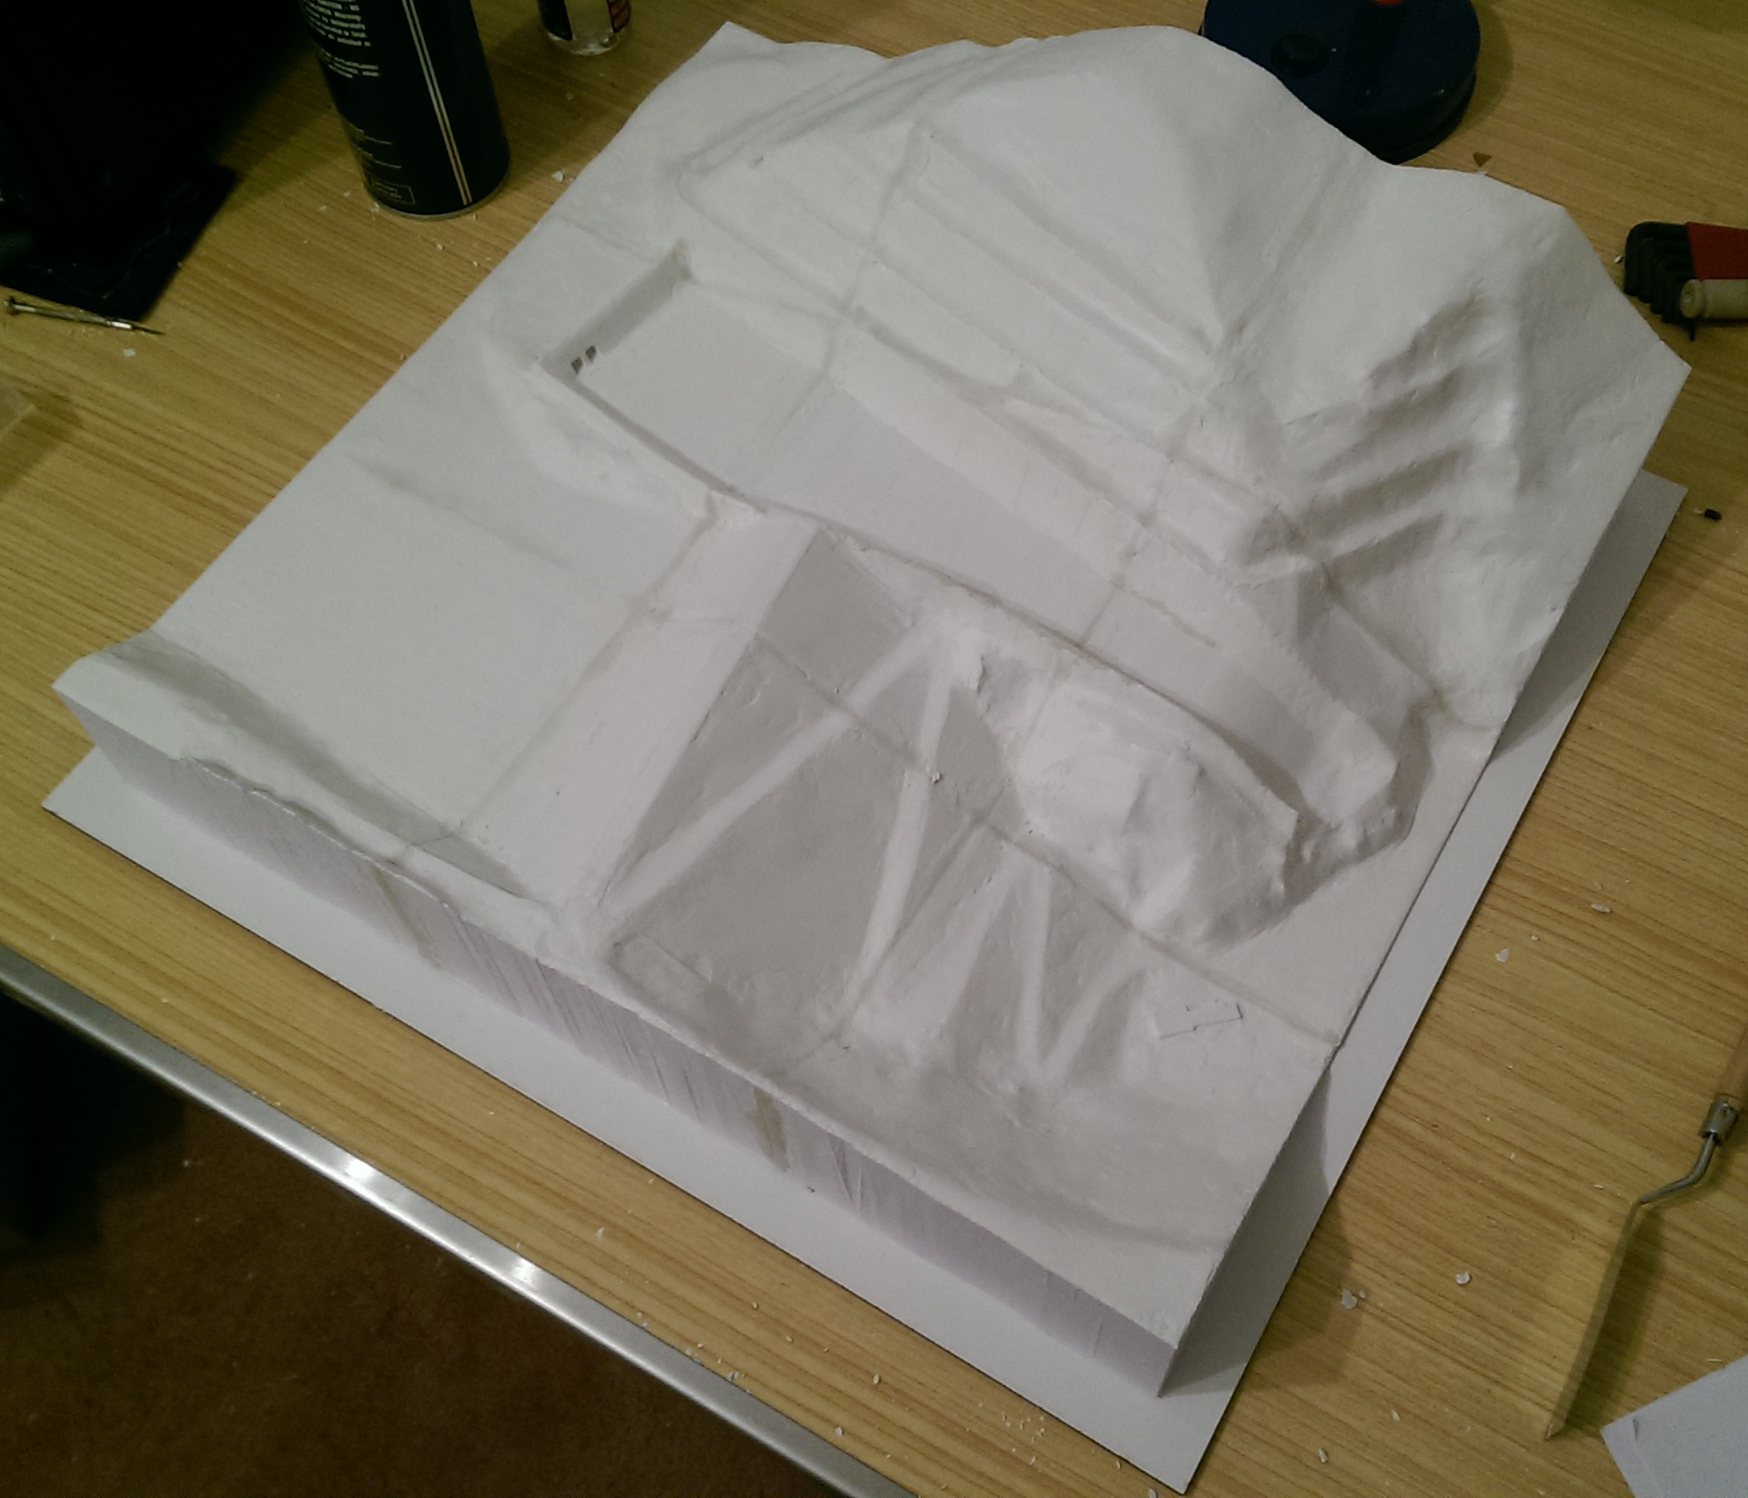
This was important since the customer wanted this to be smooth. Earlier on I had wondered about using modeling clay to smooth out the gaps but then thought about smoothing out the entire model. This would allow the gaps to be sealed with the same material as the rest of it, completely hiding the seams. It would also allow relatively easy sanding of the model down to a smooth finish. As anyone who has used PLA would know, it is very difficult to sand down and such a large model with low profile 0.30mm layers, this could very well be impossible to smooth. I tried a small-scale section to see how it looked.
This smoothed out the layers considerably and looked better in general since that we were trying to give an impression of it being an excavation site so it should appear natural and rocky. Of course, time was never on my side and I only had a few days left at this stage. There was no room for error. After many, many hours and some very sore fingers I managed to clay up the entire model and join the seams together on top of a laser cut white base board.
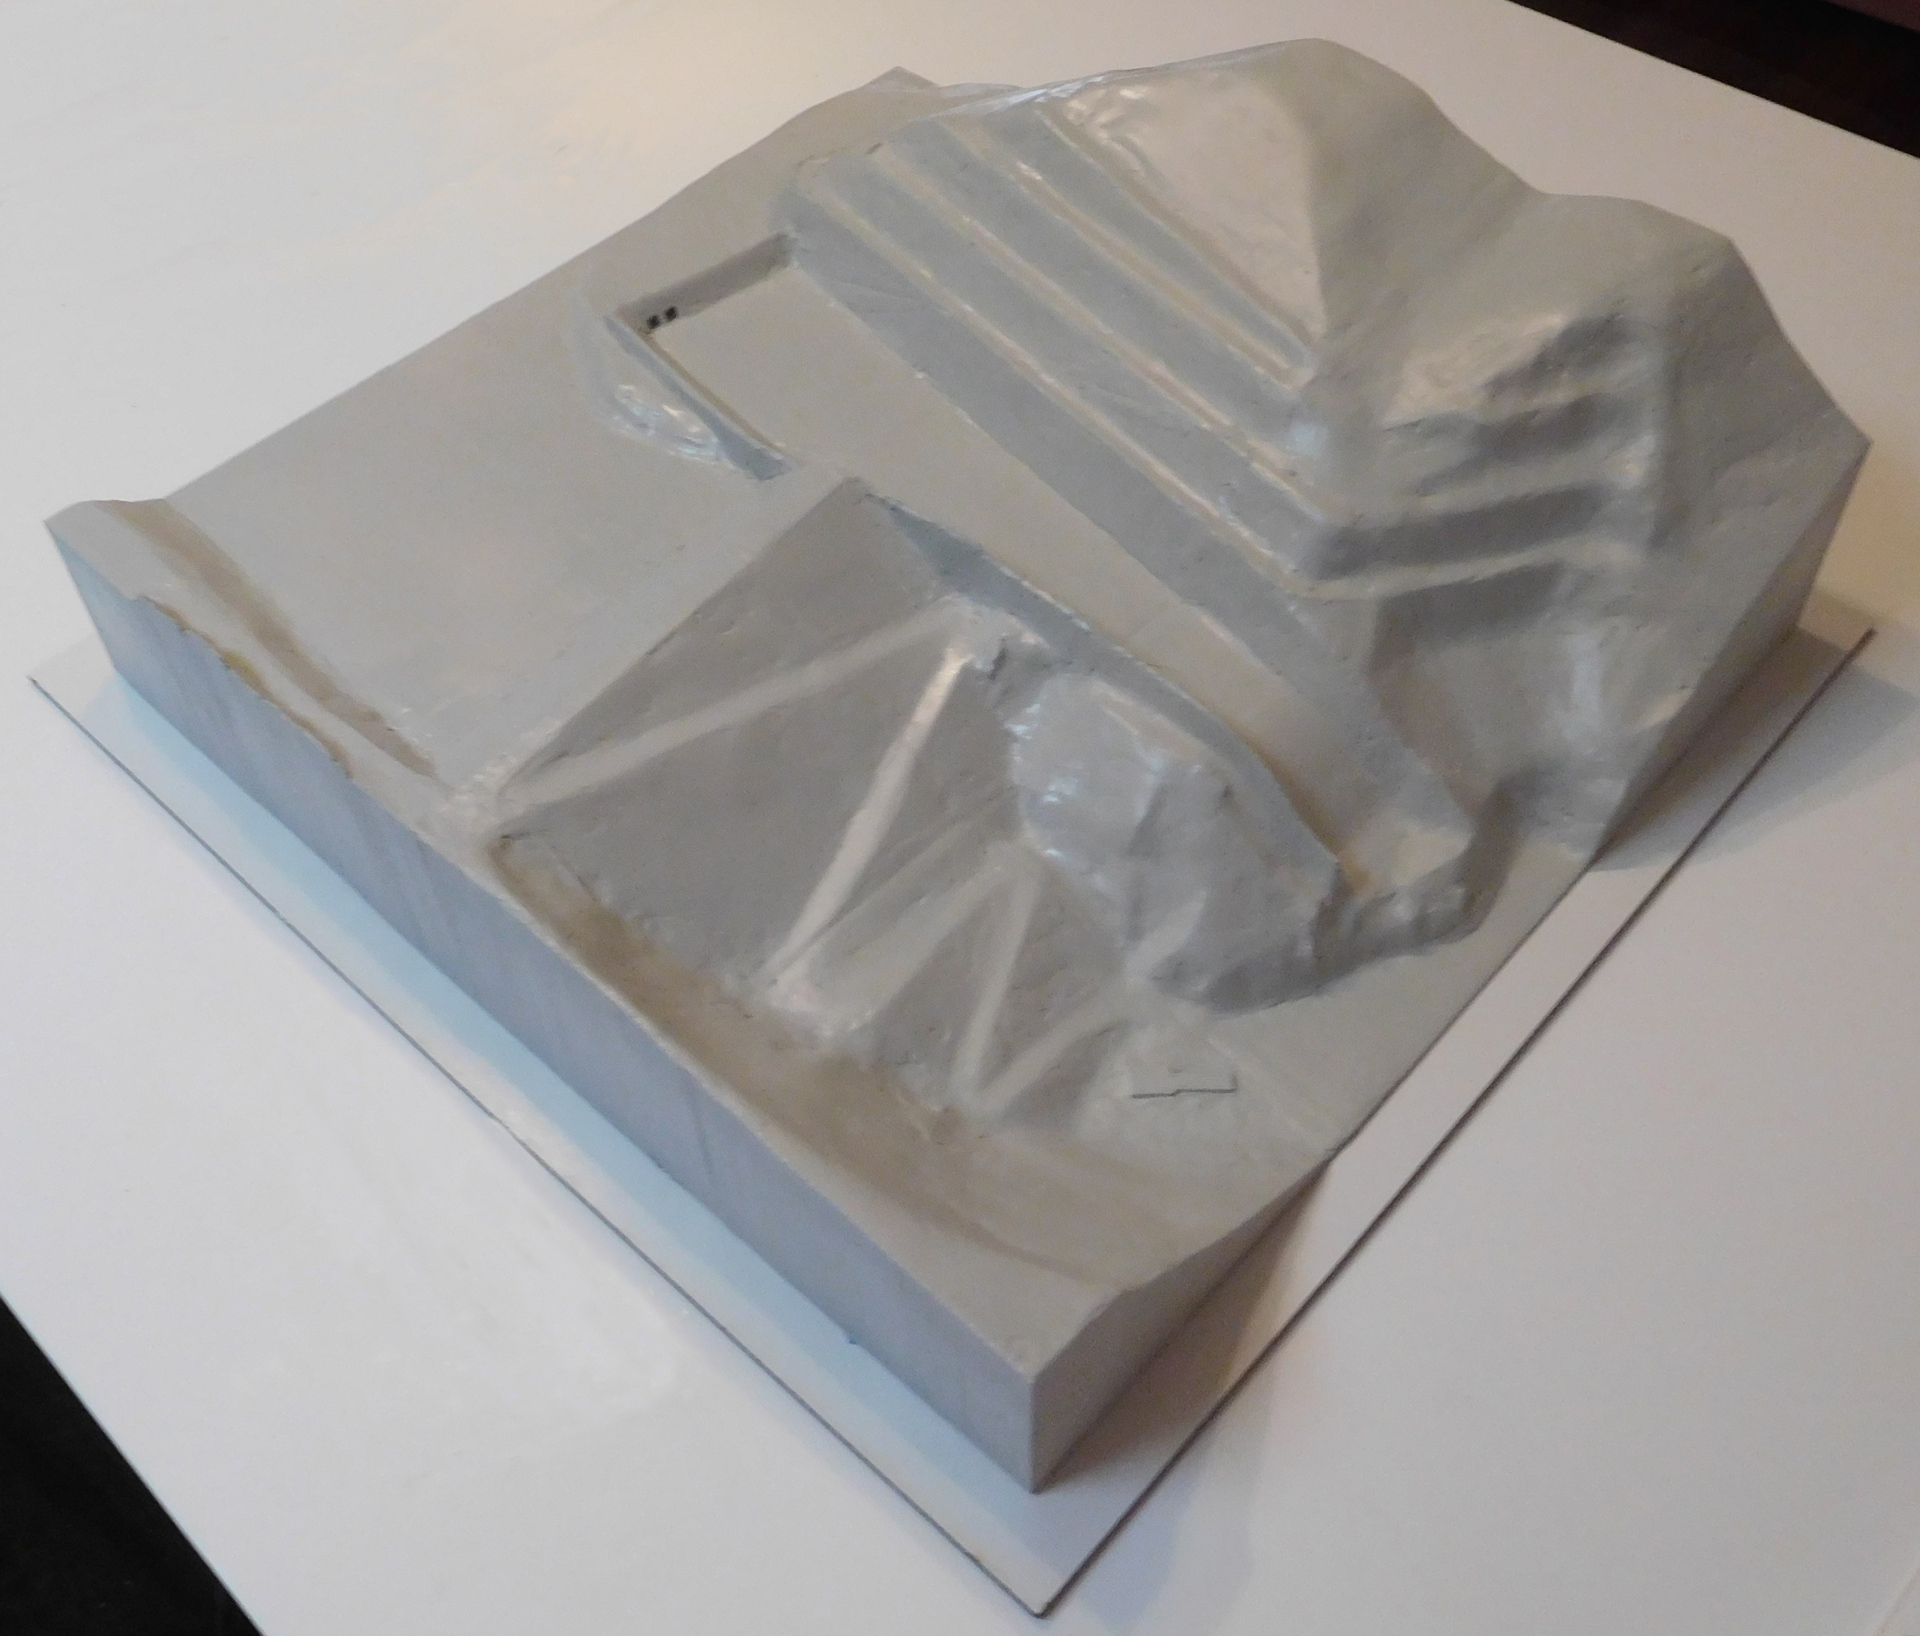
With one day to go, I painted it shale grey, the colour the customer wanted and the model was finished. The customer was very happy with it. The smoothed out clay really gives the impression this was made in plaster and looks considerably heavier than it is.
For good measure, the final 2 chaotic weeks of this job were done while I was working full-time at Adelaide Uni as a consultant, I was working past 2am every day for 2 weeks straight.
Details:
Makerbot Replicator 2
Filaform White 1.75mm PLA
86mm/s, 0.30mm layer height, 11% infil, 2 walls with 4 roof layers, no support, 2mm brim
425mm x 403mm
Approximately 65 hours printing, 10 hours finishing, 6 hours working on the digital model