For all requests regarding my PUBG level 3 helmet, please use this page as a reference.
I am offering the helmet .STL files for sale for $10USD or the finished helmet printed and painted myself for $180USD. If buying the files, that comes with full assistance in splitting the file, printing and any help you may need. As I am in Australia, shipping rates may be costly, up to $35USD. Please send all enquiries to danieljbrown88@gmail.com Please copy and paste or use the direct link, ensuring not to miss the ‘j’ in the middle. If you do not own a 3D printer it is perfectly feasible to find someone local who does and get a quote from them. I can send the printer operator an estimate of the hours and materials used so they can quote you. Customers may find it is cheaper and quicker to go down this route although that would involve finishing the product themselves.
Here are some important aspects of the helmet. For any order placed please ensure you are fully aware of these facts;
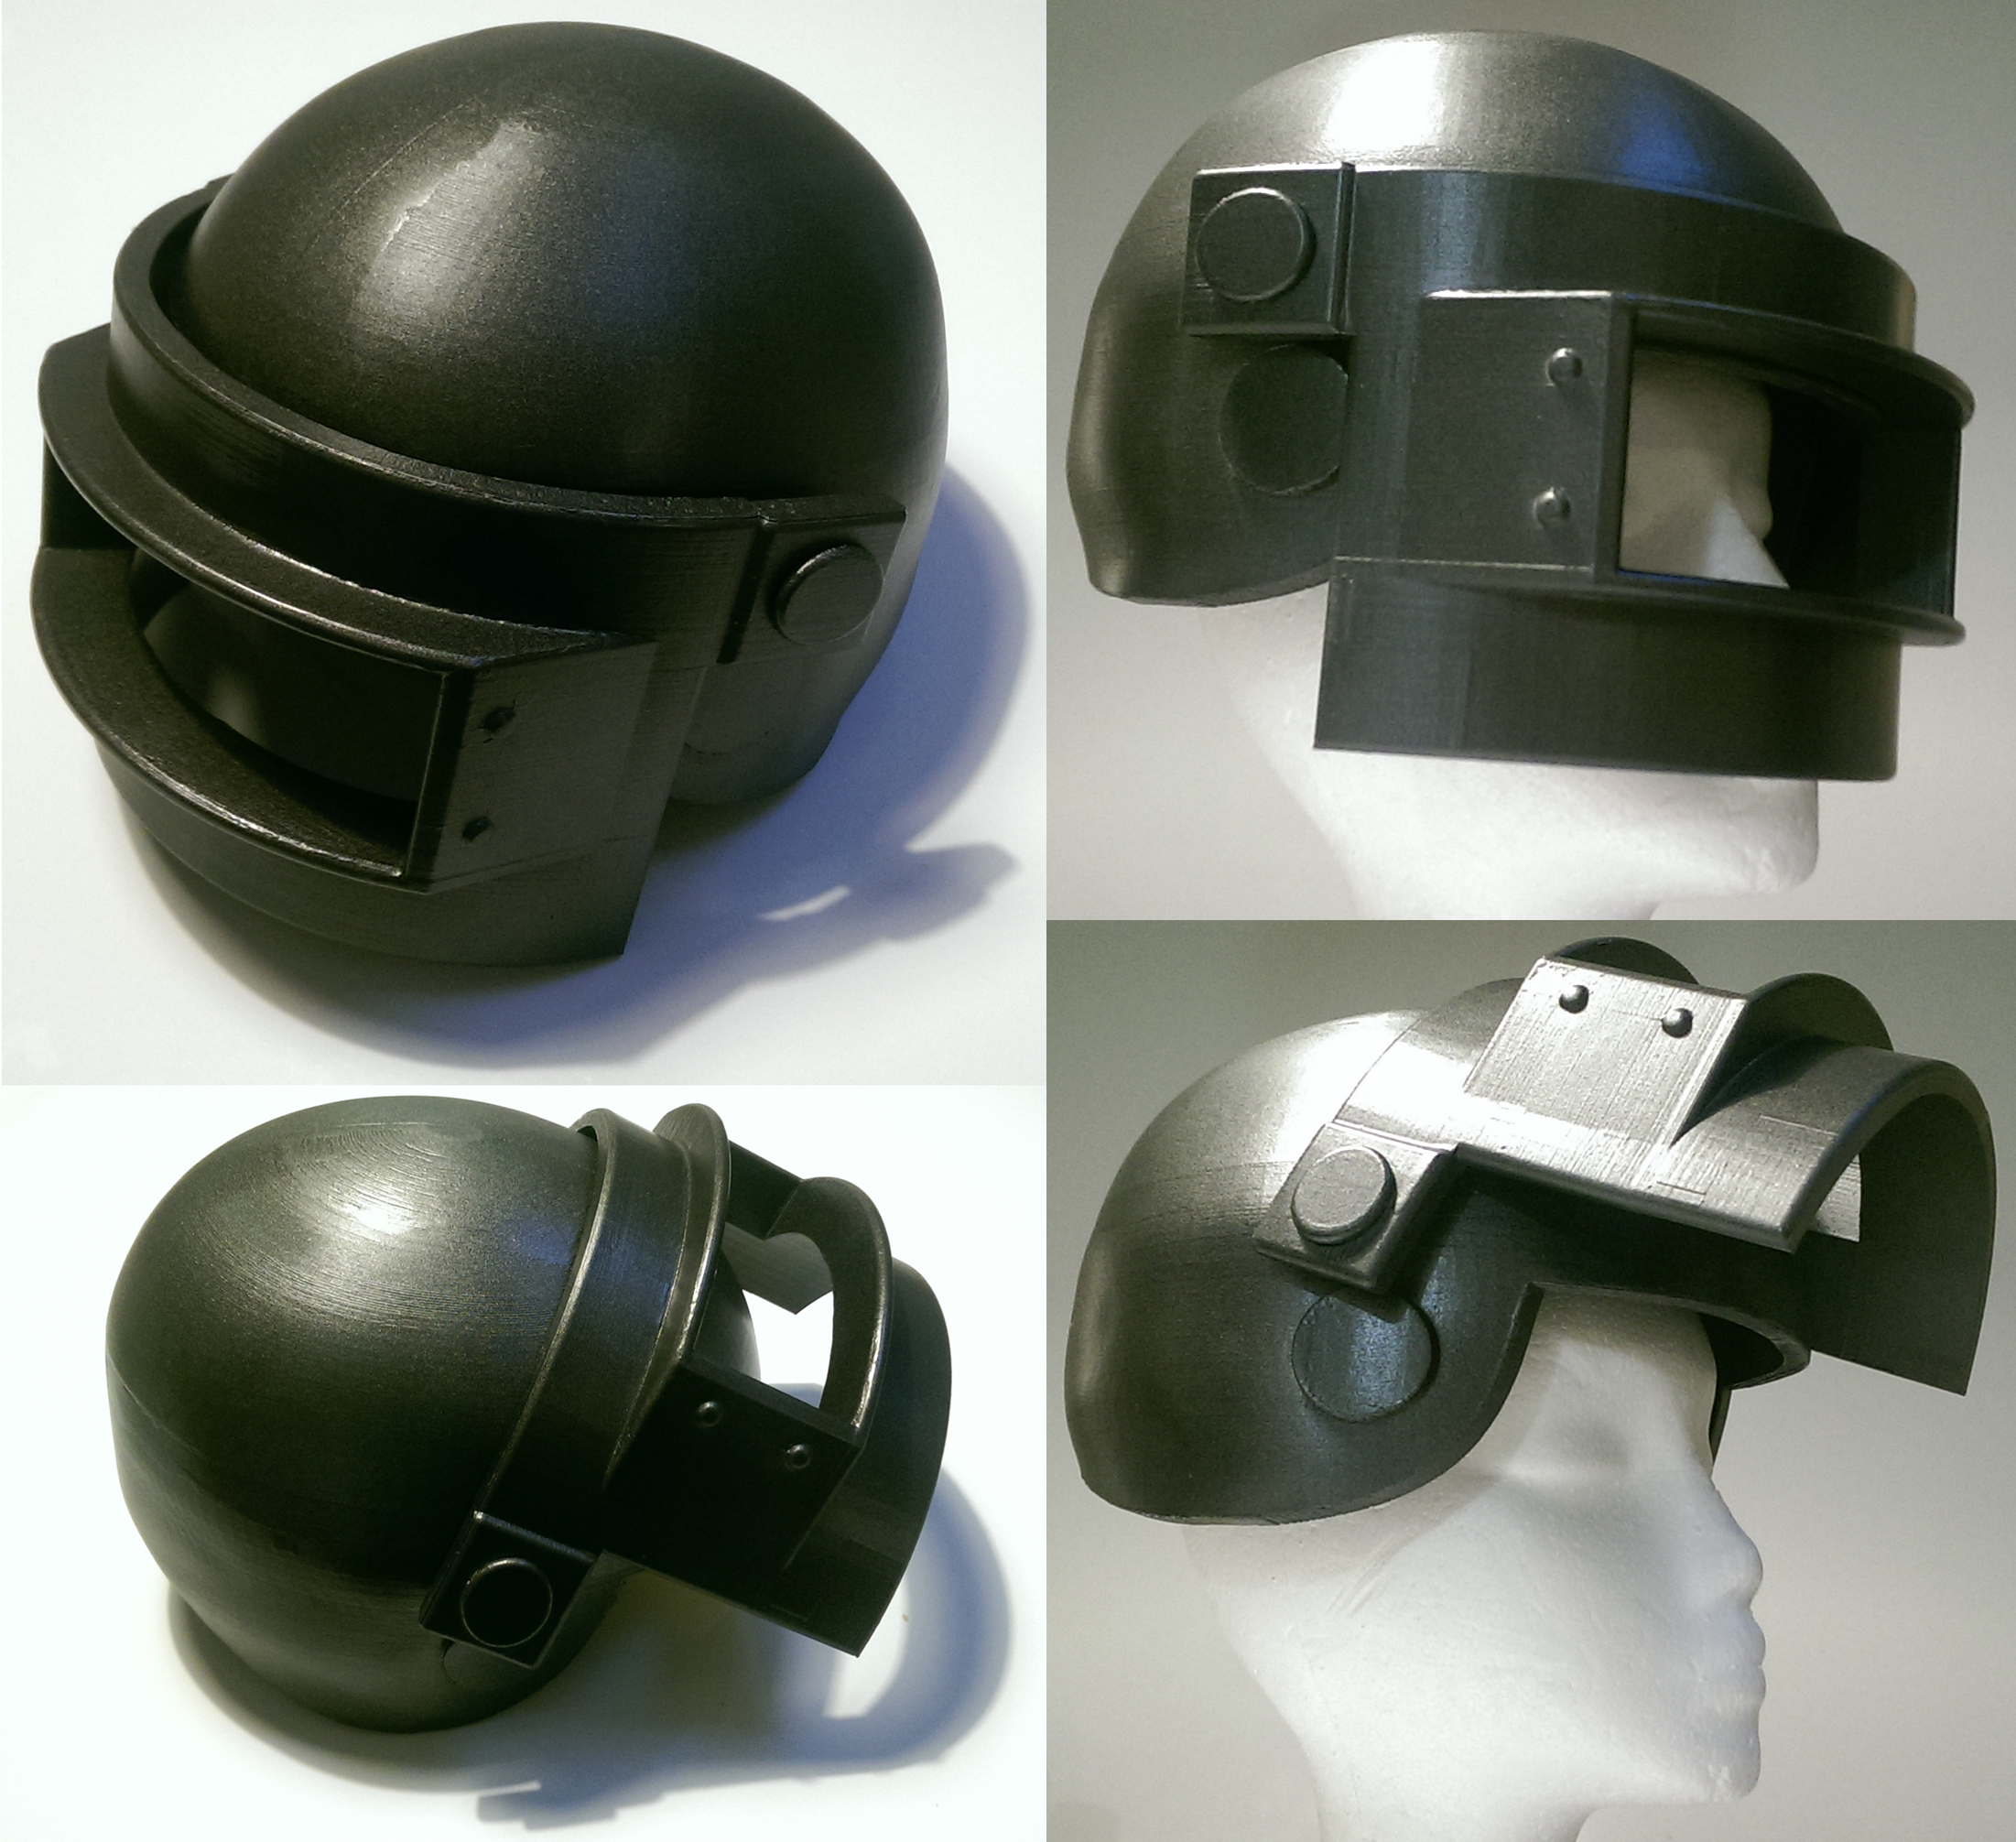
- The helmet is designed slightly larger than normal to account for people with large heads. It is intended that foam be placed on the inside by the customer to suit their head size. If you wish, feel free to send me the circumference of your head by measuring around your eyebrows and around you ear and I can make sure the helmet is not too small. It should fit most people with 1cm to spare on the sides.
- There is a slot for a chinstrap to be used if desired. This I will leave to customers as well unless they would like me to make one. I believe it would be cheaper and easier on the customers end to find a bit of strap and do it up themselves but if they want, I can add it. It will add a little cost though, $15USD for it.
- The paint used is Rustoleum metallic flat soft iron. In use it is likely the paint will wear out. If you need to re-coat it, use that brand.
- I 100% recommend it be printed from PLA plastic to keep the tolerances right. PLA plastic will degrade when left in harsh sunlight, customers must be aware that 3D printed PLA will warp under prolonged exposure to strong UV light. In Australia this is a problem, less so in other parts of the world but it should always be kept out of temperatures higher than 36 degrees Celsius (96 degrees Fahrenheit).
- When splitting up the print, I use 4mmx4mmx8mm square pegs with 0.5mm chamfered edges in regular locations in order to locate the pieces together accurately before super gluing the pieces together. This can be done by the customer if they wish and I highly recommend it to suit their machine. For example, the picture below is how I used pegs to suit my machine (Click for higher resolution).
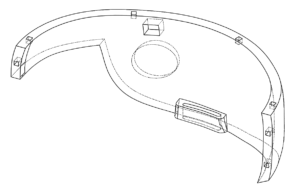 If the customer needs me to add these to suit their printer just let me know and I’ll do it. Otherwise any .STL editing program can do it, I recommend tinkercad.
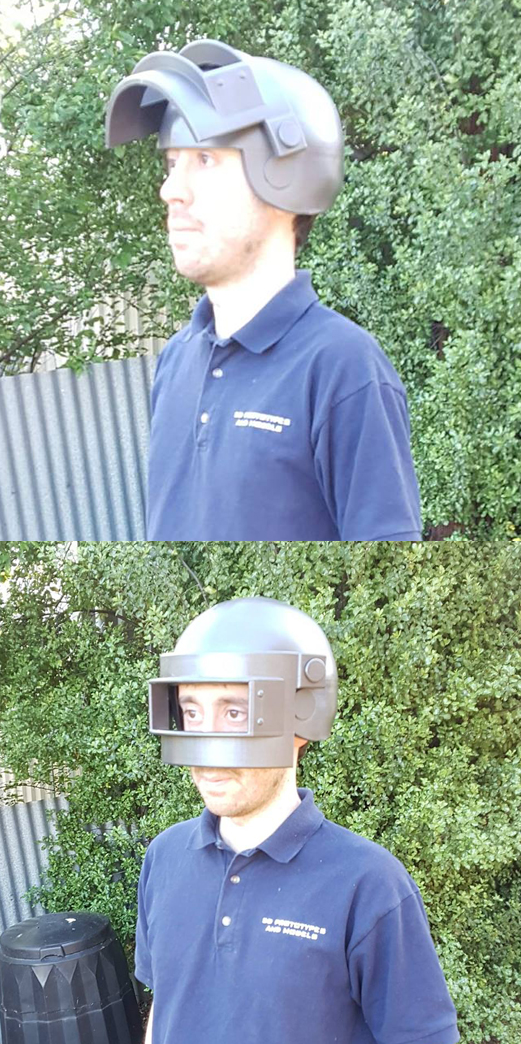
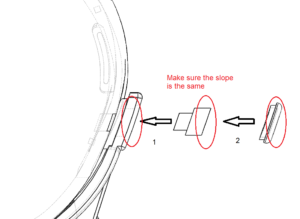
 - Assembly is as below. With the helmet fully assembled, place the mask over the helmet and line up the pegs with the holes. Insert the pegs into the holes through the mask and then into the helmet. It is very important it is angled correctly, make sure the slope of the pegs matches the slope of the helmet outside as shown. Push in until it can not go in any further.
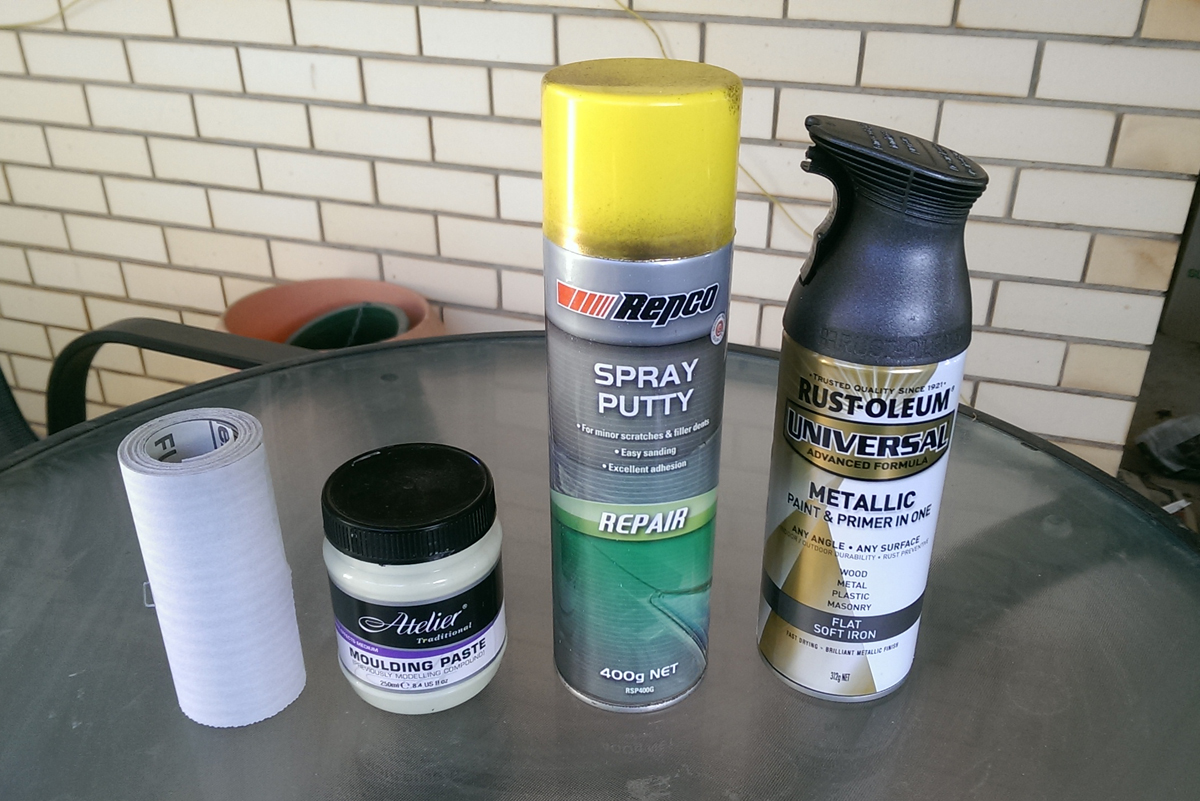
- I recommend finishing the print by applying moulding paste to fill in the seams and the rough sections on the surface, sanding the excess down with 200 grit sandpaper then applying spray putty to further smooth out the print. A metallic iron-coloured spray paint will look best, a photo is attached below of the products I used.
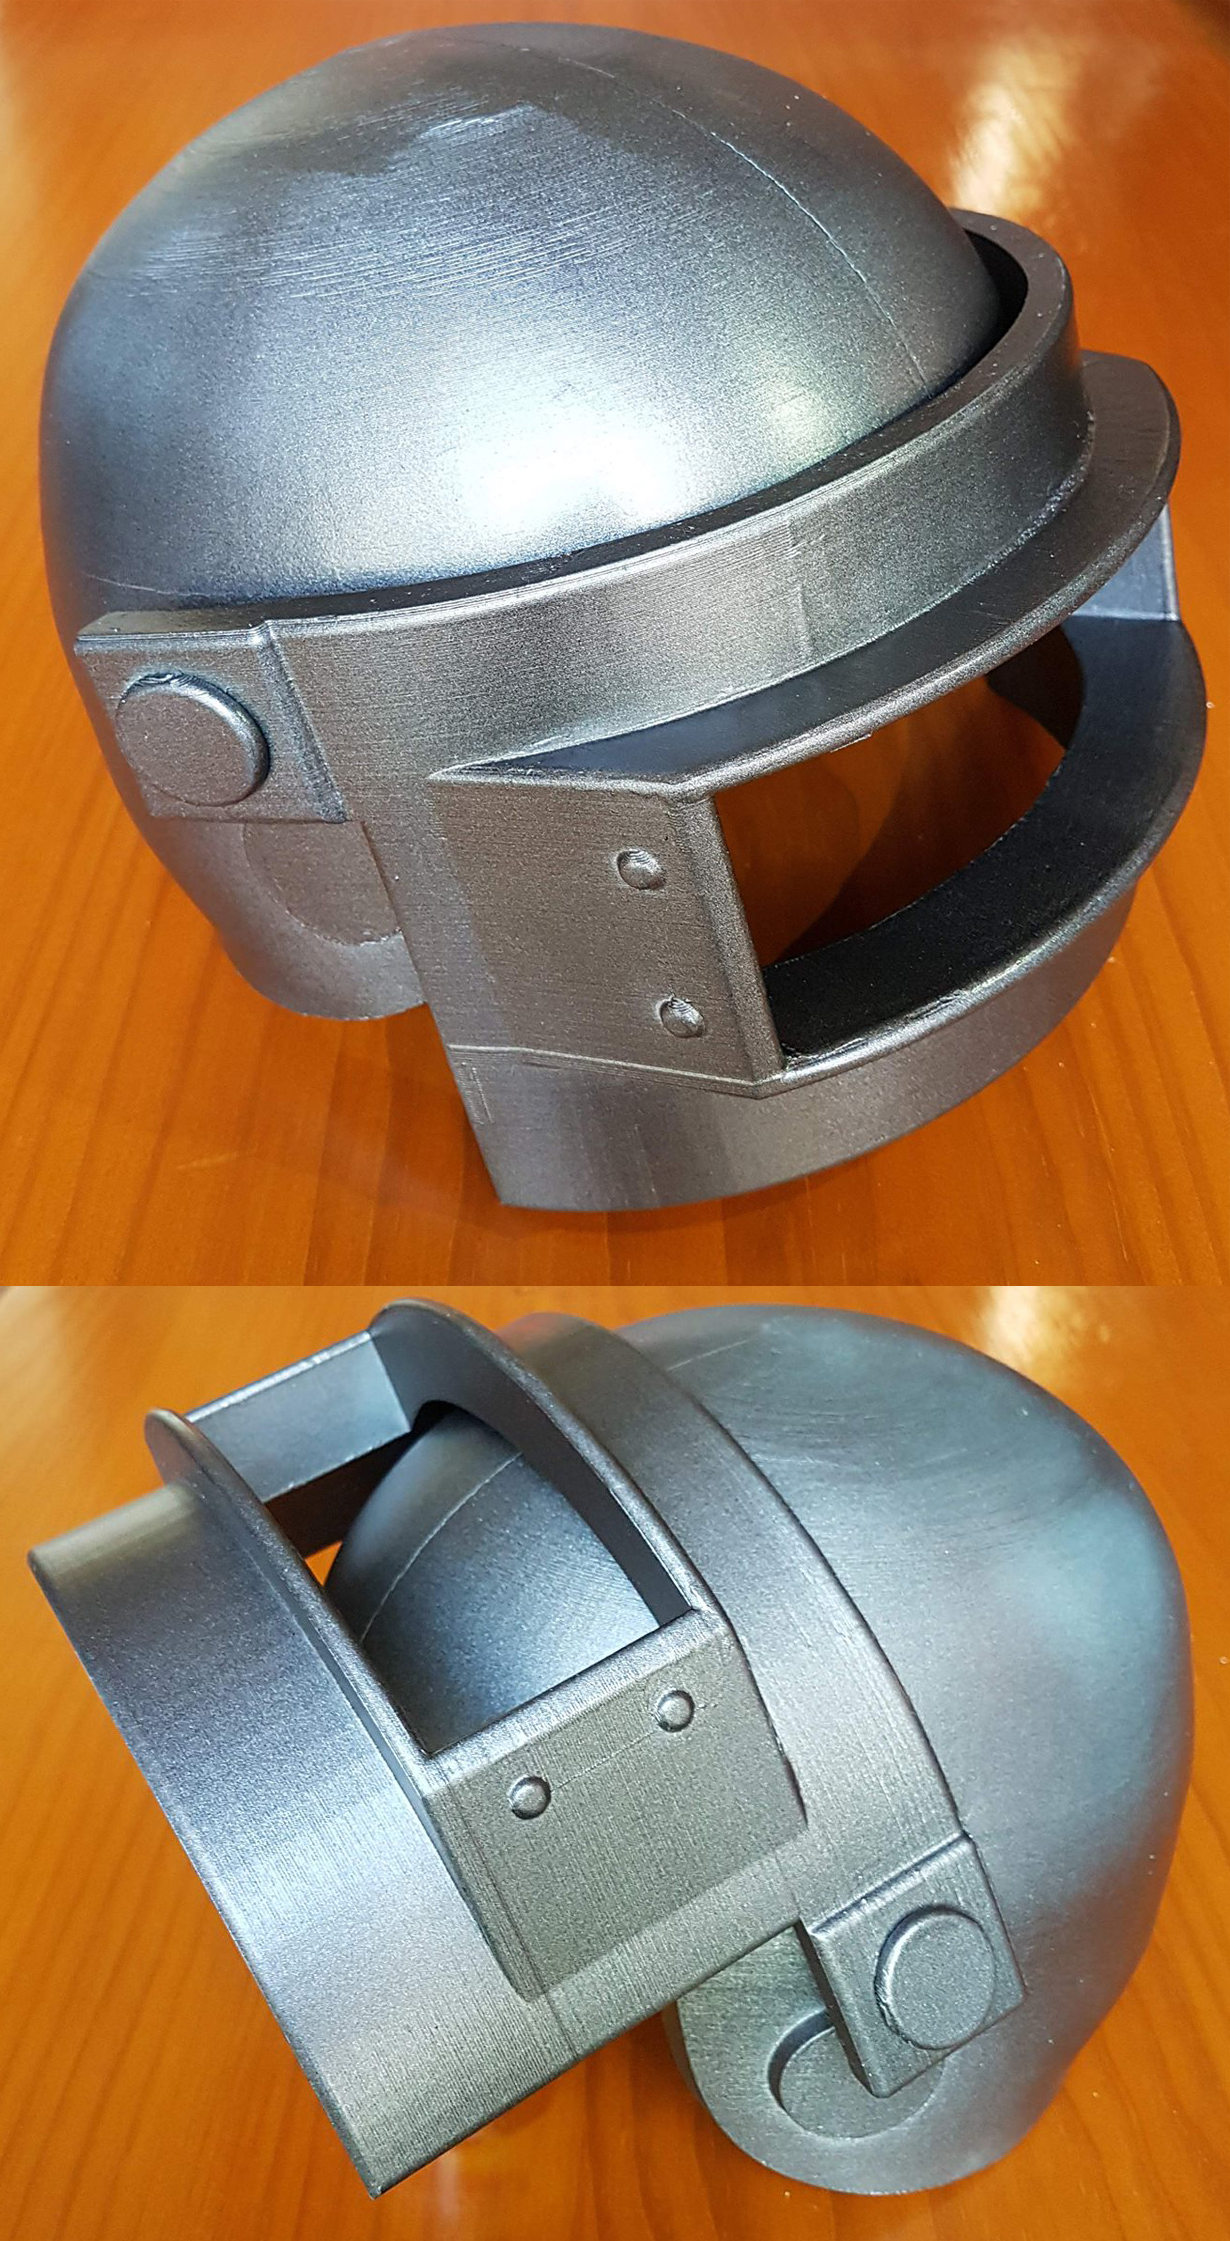
- It may look a little strange how the helmet fits together with these odd angled pegs but I did this for a reason; it allows the helmet to be a more spherical shape instead of having a flat edge where the hinge is. I think looks better that way and it also helps the helmet lock in the open position. The visor section is larger than in-game as having a wider field of view is always important when in costume so you don’t walk into things. I also decided not to add the protrusions on the back side of the helmet as I simply think it doesn’t look nice. If customers want I could add it there though for no extra charge.
- Adding a visor to the front is possible but not something I offer currently. Another case of personal preference, I like keeping things simple and affordable and adding a curved perspex panel there would add significant costs, it may be cheaper to find local suppliers since in Australia they are quite expensive.
- These helmets take me approximately 4 days to make however my availability to make them is highly variable. I will let all customers know expected deadlines and current queue upon ordering.
- The file is explicitly not allowed for re-distribution for commercial purposes however modifications are allowed for the user as long as they maintain credit to here and do not sell or freely share their derivations. What this means is customers who buy the file can make whatever changes they want when printing for themselves, they may tweak the design to manufacture helmets and sell those helmets locally however they must not distribute freely or sell the raw or modified files in any scenario.

Creative Commons Attribution-NonCommercial-ShareAlike 4.0 International License.
I encourage anyone who finds someone violating this rule to contact me.